Block printing has always fascinated me. The idea that you can transform a single carved block into a repeating design across fabric or paper feels almost magical. This was my first hands on experience where I experimented with different repeat patterns and learning the subtle techniques that make a design look clean and professional.
Understanding Repeat Patterns
Repeat patterns are a key part of block printing because they allow a single design to be printed multiple times in a consistent way. A repeat pattern means that the same block is stamped over and over in a specific layout to create a larger, continuous design. The most common types are straight, brick, and half-drop repeats. In a straight repeat, each print lines up directly next to or above the last one, while brick and half-drop repeats are staggered, giving the pattern more movement. Learning how to measure and align your prints correctly helps keep your pattern neat and balanced, which is an important step toward getting clean, professional-looking results.
Before getting started with printing, I first learned about the different types of repeat patterns and how they form the foundation of block printing designs.
Brick vs. Straight Repeats
Out of all the patterns I tried, the brick repeat was definitely the easiest for me. It was much simpler to line up the corners accurately, which helped me keep a consistent rhythm as I printed. The straight repeat, on the other hand, was a bit more challenging. I found myself either leaving too much space between prints or slightly overlapping them, which created small, raised globs of paint where the corners met. It was trickier than I expected to get a perfectly clean pattern!
Lessons in Technique and Pressure
One of the biggest takeaways from this process was just how important even paint application is. I learned that you need to roll your brayer in paint and then evenly roll it onto your rubber block — not too much and not too little. Too much paint causes it to squeeze out the sides when you press it down, leaving messy edges or unwanted globs.
I realized that applying even pressure across the entire block is key. In some of my prints, I didn’t press firmly enough on the edges, which left unprinted areas where the paint didn’t transfer. Next time, I’ll make sure my block is fully covered and that I apply equal pressure across every part of it.
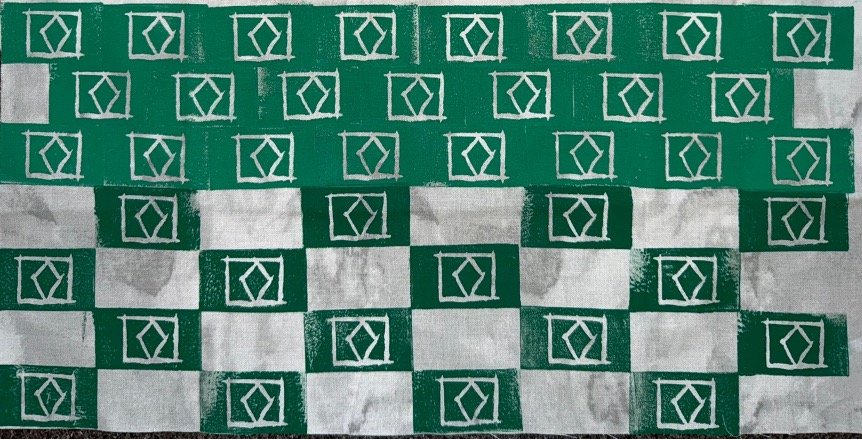
(Finished repeat pattern)
Looking Ahead
Overall, this was such a valuable first attempt and learning experience. Through trial and error, I got a feel for how much paint and pressure are needed to make a successful repeat pattern. Next time, I’d love to experiment with other layouts, like the half-drop or half-brick repeats, and continue improving my technique. Block printing is a process that requires practice, patience and attention to detail, and I can’t wait to improve my technique!
Very interesting to learn pattern designing I will definitely be trying this out soon !